POS Sale Header Setting
The till screen is a receipt being built in front of the customer: a header at the top (number, customer, salesman) and item lines below. This setting decides which fields the header shows and which columns the item table has, plus how much room to give the buttons and whether to draw item pictures.
Where to find it: Modules → POS → Settings → POS Sale Header Setting
Whatever does not fit on the till screen the cashier will neither see nor enter. So the setting is short but very visible: it shapes the workplace.
Menu: Modules → POS → Settings → POS Sale Header Setting.
Worked example
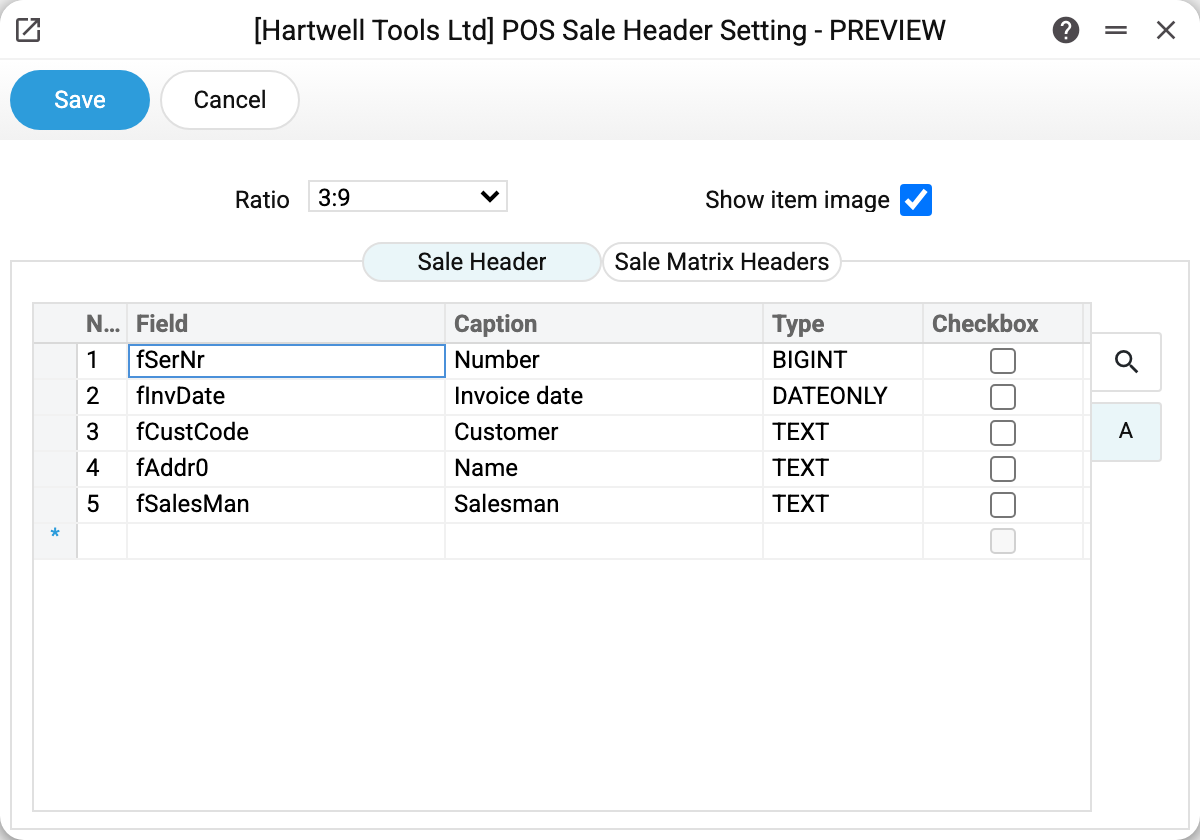
Ratio 3:9 splits the screen width between the button block and the item table: three parts to the buttons, nine to the receipt. The values come from a list (3:9, 4:8 and so on); the bigger the first number, the wider the button pad.
Show item image puts the picture from the item card onto the item buttons. Clear it and only the labels remain — more tiles fit on a page.
Below are two tabs.
"Sale Header" holds the receipt header fields. Five in the example: number, invoice date, customer, customer name, salesman. The field is picked from the list of invoice fields, while Caption and Type are filled in by the system from the document description — that caption is what the cashier sees. Checkbox marks tick-box fields (the "OK" flag, for instance).
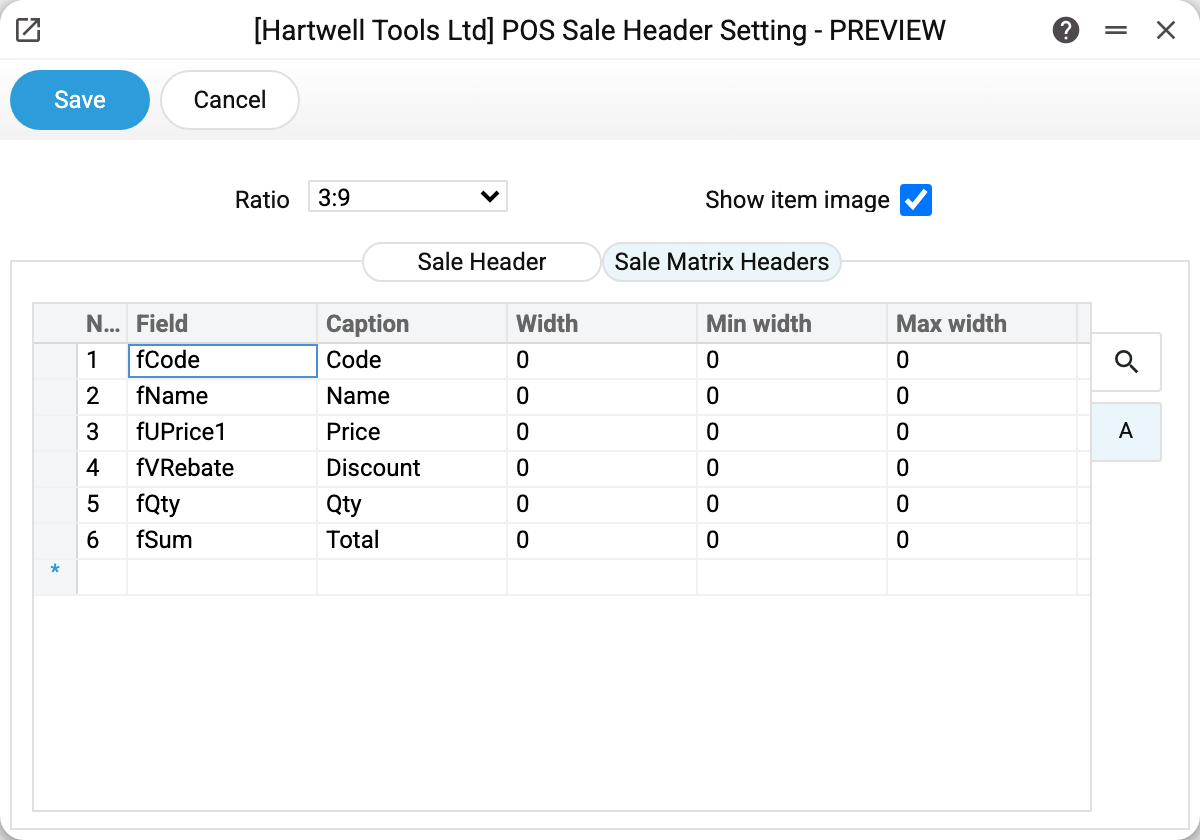
"Sale Matrix Headers" holds the columns of the item table: code, name, price, discount, quantity, total. Seven columns are available (the seventh is the unit of measure). Width, Min width and Max width left at zero mean "let the system distribute the space".
The order of rows in both matrices is the order of fields and columns on the till screen.
Where the data comes from
- The header field list is the field list of the Invoices document: the till screen shows exactly the document the till creates for every sale.
- Caption and type are never typed by hand: once you pick a field, the system copies its caption from the document description. Change that caption in the system and the receipt follows after the field is picked again.
- The list of item columns is fixed (seven entries) — those are the fields of a receipt line.
- There is one setting per company: layouts cannot differ between tills or departments. What can differ from shop to shop are the buttons — see POS Buttons.
A row of the item matrix without a field or without a caption is not saved ("Field is empty", "Label is empty"). Rows themselves are not required: the setting saves with no rows at all, and the till then shows its fallback set of columns — image, code, name, quantity, price, sum, discount.
Parameters
| Field | Description |
|---|---|
| Ratio | How the screen width is split between buttons and receipt (3:9, 4:8…). |
| Show item image | Draw pictures from item cards on the buttons. |
Tab "Sale Header"
| Column | Description |
|---|---|
| Field | Technical name of an invoice field. |
| Caption | The text the cashier sees; filled in by the system. |
| Type | Data type of the field; filled in by the system. |
| Checkbox | The field is a tick box. |
Tab "Sale Matrix Headers"
| Column | Description |
|---|---|
| Field | A receipt line column: code, name, price, discount, quantity, total, unit. |
| Caption | Column heading on the till screen. |
| Width, Min width, Max width | Column sizing; zero means automatic. |
Common situations
The cashier cannot see who is buying. Add the customer code (fCustCode) and customer name (fAddr0) to the header — without them the receipt shows only a number.
The discount is invisible. The discount column (fVRebate) must be in the matrix; otherwise the discount is applied but never shown.
The buttons are too cramped. Change the ratio from 3:9 to 4:8 — the button block grows at the expense of the table.
Item pictures do not appear. Check two things: "Show item image" here, and "Use image link from Item" on the button itself (POS Buttons).
See also
- POS Buttons — the other half of the till screen
- POS Tips Setting — the ticker at the bottom of the screen
- Invoices — the document the till creates for every sale