POS Buttons
The till screen is not a fixed program — it is a set of buttons you draw yourself. One record of this register = one page of buttons: how many there are, what they do, what colour they are and which row they sit in.
Where to find it: Modules → POS → Registers → POS Buttons
There can be several pages, and the cashier moves between them with a button: "Main page" holds the commands (new receipt, customer, payment), "Goods" holds tiles of fast-moving items the cashier adds with a single tap.
Menu: Modules → POS → Registers → POS Buttons.
Worked example
The demo stand has two pages — a command one and a goods one.
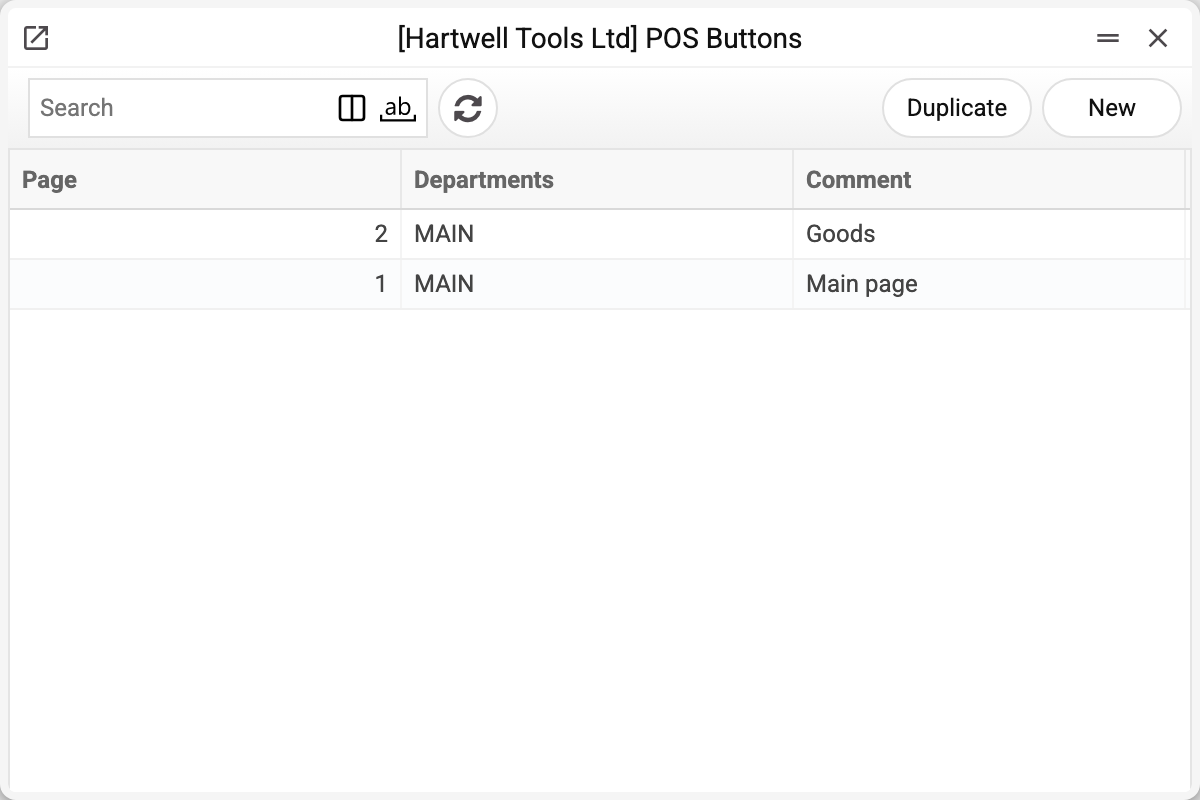
The journal shows the page number, the department and the comment: page 1 «Main page» with the commands, page 2 «Goods».
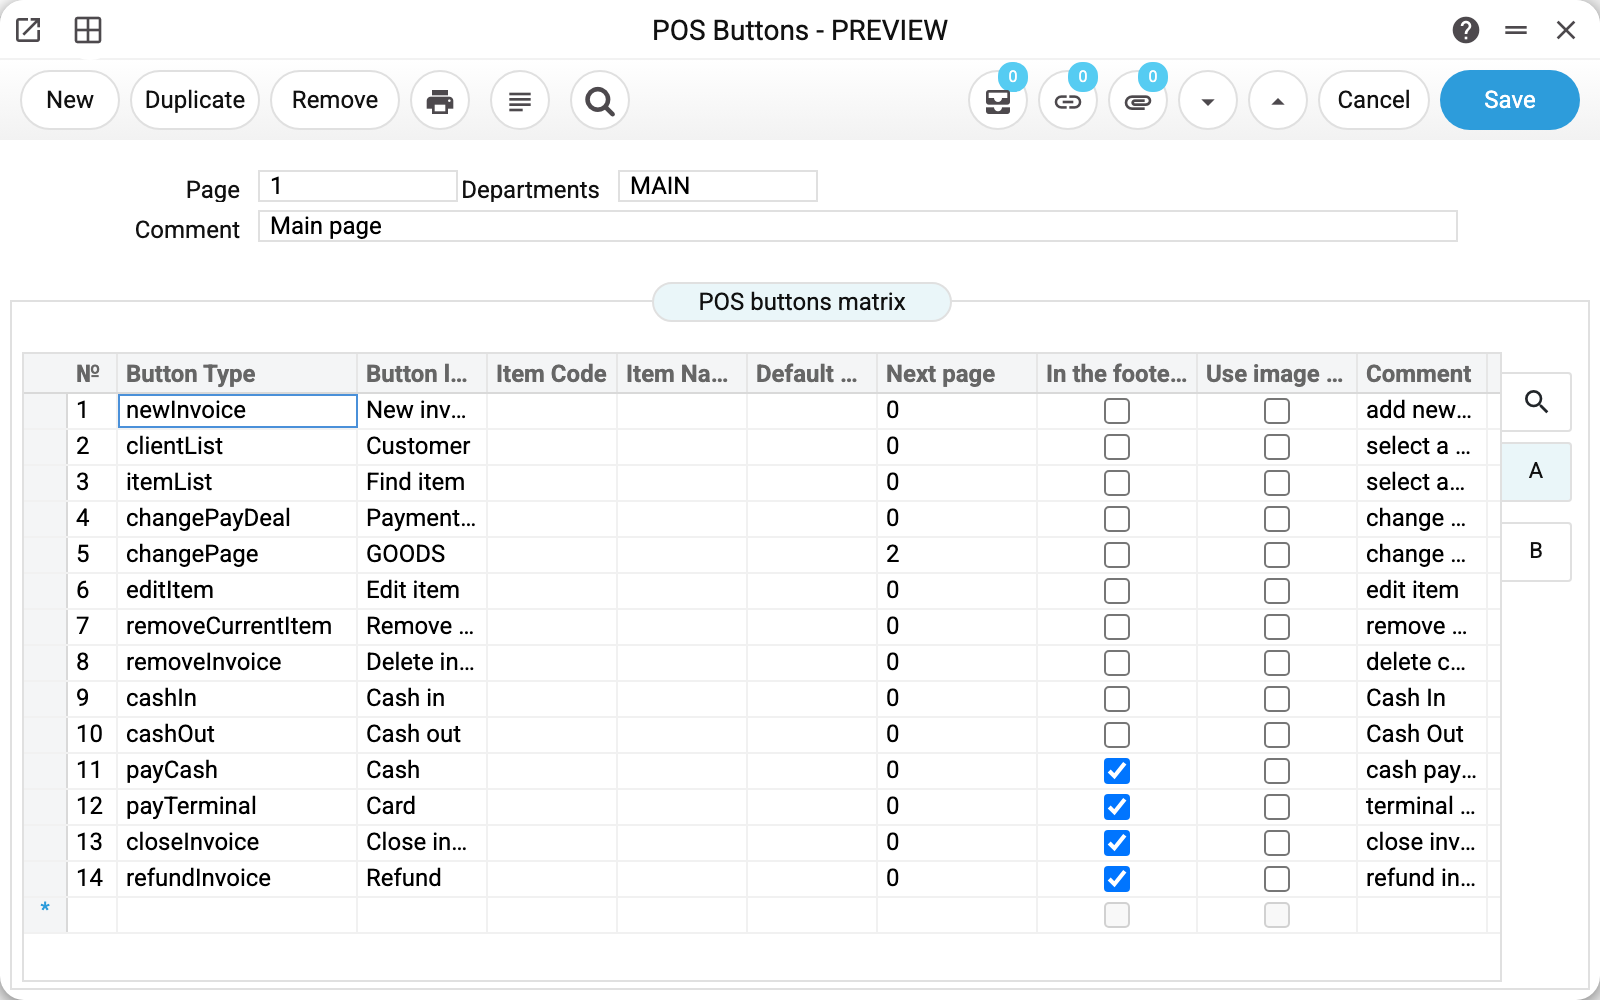
At the top, three fields that say who sees this page and when:
- Page
1— the page number; the navigation buttons refer to it; - Departments
MAIN— the department the set belongs to. The till asks for buttons by the department of its own point of sale, so every till of one department sees the same buttons; - Comment "Main page" — the page name; this is what the cashier sees on the page switch.
The pair "page + department" is unique: there cannot be two pages numbered 1 for department MAIN. The till opens on page 1 — so every department with a till needs a page numbered 1.
Then comes the matrix. Every row is a button, and the key column is the Button Type — not a caption but the action the button performs. There are twenty types, covering the whole selling cycle: newInvoice — start a new receipt, clientList — pick a customer, itemList — search the item list, getItem — add one specific item, editItem — edit the line, removeCurrentItem / removeInvoice — drop the line or the receipt, payCash / payTerminal / payOther / payCheque — payment in cash, by terminal, by another method and by cheque, closeInvoice — close the receipt, refundInvoice — refund, cashIn / cashOut — cash in and cash out, changePayDeal — change the payment terms, changePage — jump to another page of buttons, addComment — a comment on the receipt, printReceipt — print the receipt, chooseSalesman — choose the receipt's salesman.
Button label is what the cashier reads. It need not repeat the name of the action or of the item: row 5 has type changePage and the label "GOODS", because what matters to the cashier is not "change page" but "go to the goods". The same row has Next page = 2 — that is where the jump leads.
Comment explains the button; the system fills it in when you pick the button type, and the till shows it as a tooltip when the mouse is over the button.
The In the footer block flag is set on the last four rows — "Cash", "Card", "Close invoice", "Refund". Those buttons are not drawn in the general grid but in a separate strip at the bottom of the screen: they finish the sale. The till takes the strip once — from page 1, where it starts — and keeps it on every page; on other pages a button with this flag does not appear anywhere.
The goods page
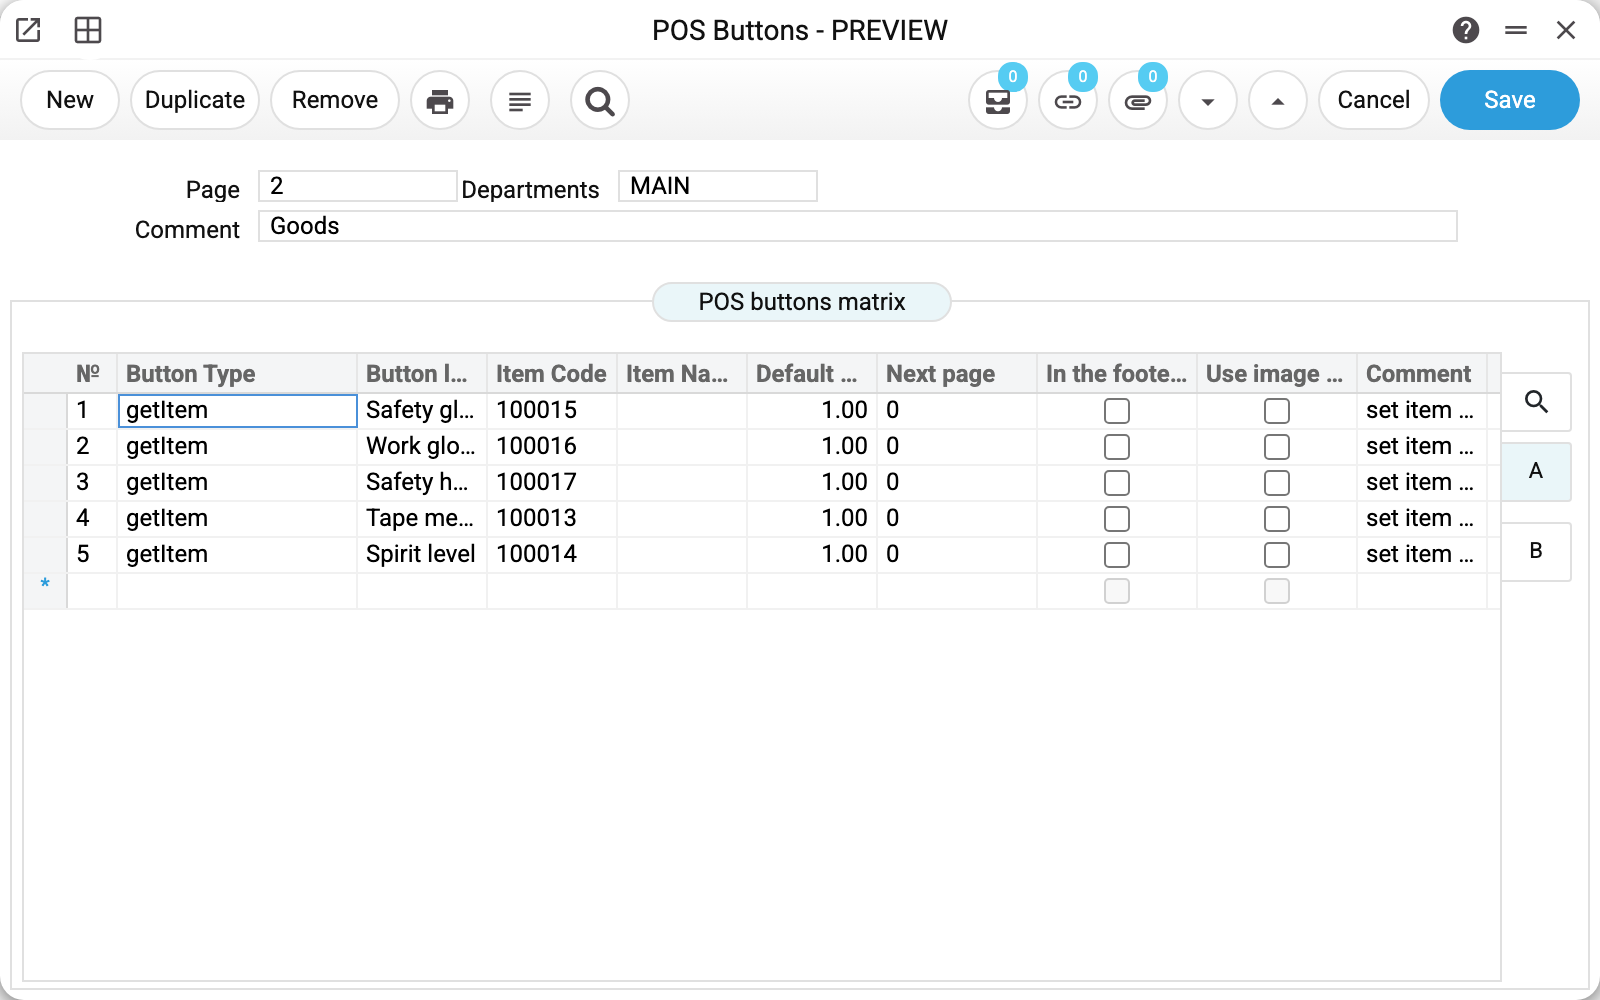
Here every button is of the same type — getItem — and each one carries:
- Item Code (
100015,100016…) — what exactly goes into the receipt; - Item Name — filled in from the item card, as a cross-check;
- Default quantity
1.00— how many units one tap adds. One for a helmet, or 0.5 for half a kilo of something sold by weight; - Use image link from Item — switched on, but the system only stores this flag: neither the server nor the till reads it, and the tile does not get the picture from the item card. For a tile with a picture, fill in "Image link" on tab B.
Note that the labels are short: "Safety glasses" instead of the full "Safety glasses clear Sigmax". The tile carries a word the cashier can read at a glance; the receipt carries the full name from the item list. Mind the order: choosing the item code writes the item's full name into Button label by itself, so the short word goes in after the code.
Two tabs of the matrix
The matrix has tabs on the right: A — what the button does (type, label, hotkey, item, quantity, next page, footer, picture), B — how it looks (background colour, text colour, row, width, height, image link). The row defines which line of the grid the button sits in; width and height set the tile size.
Where the data comes from
| Field | Source | Note |
|---|---|---|
| Departments | Departments | the till takes buttons by the department of its point of sale |
| Button Type | fixed list of 20 actions | picked from a list; on saving, the system only checks that a type is filled in — a type typed by hand is not matched against the list |
| Item Code | Items | mandatory for type getItem |
| Item Name | the item card | filled in by the system once the code is chosen |
| Next page | another record of this register | only meaningful for type changePage |
Empty fields do no harm: a payCash button needs neither an item code nor a quantity.
Parameters
Header
| Field | Description |
|---|---|
| Page | Page number. Mandatory, unique within the department. |
| Departments | Department the button set belongs to. |
| Comment | Page name — the cashier sees it on the page switch. |
Matrix (tab A)
| Column | Description |
|---|---|
| Button Type | The action: newInvoice, getItem, payCash and so on. |
| Button label | The text the cashier reads. |
| Hotkey | F1–F12 — the key the cashier presses for this button; on one page a key can sit on one button only. |
| Item Code / Item Name | The item for a getItem button; the name is filled in automatically. |
| Default quantity | How many units one tap adds. |
| Next page | Page number for a changePage button. |
| In the footer block | The button is drawn in the bottom strip (the strip comes from page 1). |
| Use image link from Item | Only stored: it does not put the item card's picture on the button. |
| Comment | Description of the action; filled in by the system. |
Matrix (tab B)
| Column | Description |
|---|---|
| Colour / Text colour | Tile colours, picked from a palette. |
| Row | The line of the grid the button sits in; with row 0 or empty the button is not on the screen. |
| Width, Height | Tile size; 0 — the default size. |
| Image link | The tile's picture: when filled, the till draws a button with the picture. |
Common situations
The till opened with no buttons at all. Most often the set belongs to another department. Compare "Departments" in the record with the "Department" field of the till user in Users. The second cause — the department has no page numbered 1: the till starts on it.
A navigation button leads nowhere. A changePage button cannot be saved without "Next page". Whether a page with that number exists in the same department, the system does not check — compare the number with the list of pages yourself.
The item is added with a zero price. The button only puts the item into the receipt; the till takes the price from the receipt's price list, and when there is no price list or the item is not in it — from the item card. Zero means that the price list holds a zero or there is no price either there or on the card — see Price lists.
A second shop with a different range. Create a separate department and its own pages of buttons (page 1 included), and set this department in the "Department" field of the second shop's till user — the first shop's pages stay as they are.
See also
- POS Sale Header Setting — the upper part of the till screen
- POS Commands Setting — the same actions from the keyboard
- Departments — who owns the button set