Labels Print Setting
Goods that have just been received usually need labelling: a sticker with the code, name, price and a barcode so the till can scan them. The system prints such labels straight from a goods receipt — the "Printing labels" button in the document window.
Where to find it: Modules → Stock (also in modules: Service Orders) → Settings → Labels Print Setting
This setting says what to print and at which size. The second tab is about a different label: the sticker put on a device taken in for repair.
A worked example
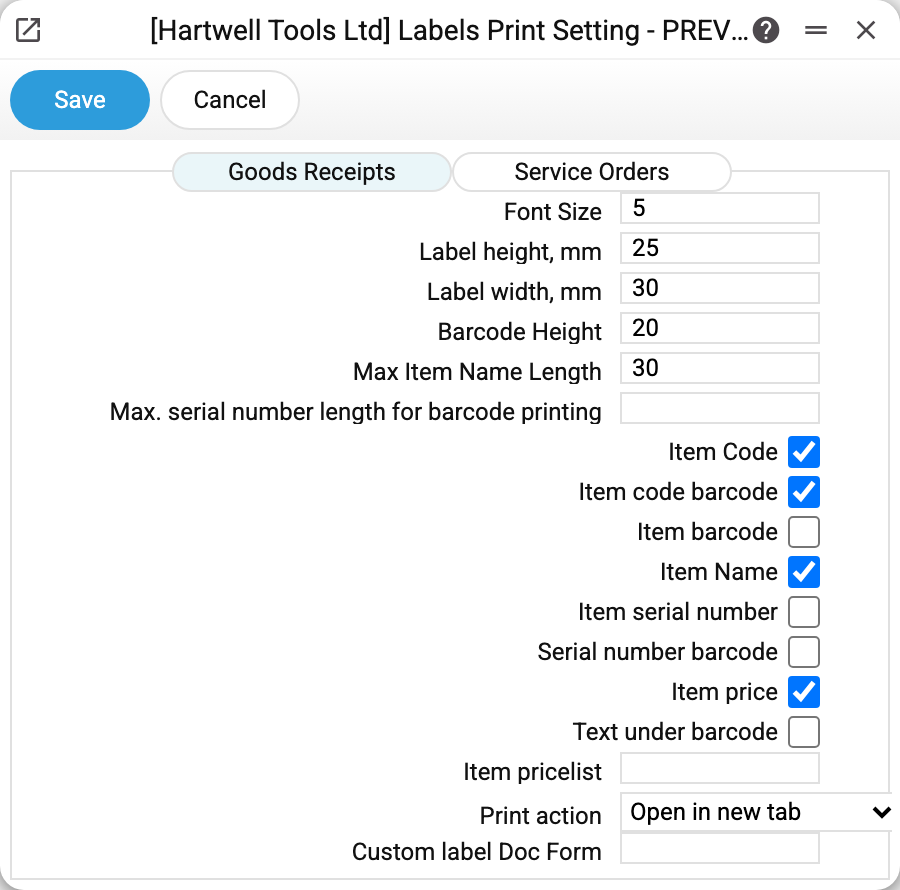
The label in the demo company is small — 25 × 30 mm, font 5, barcode height 20. Four elements are switched on: Item Code, Item code barcode, Item Name (trimmed to 30 characters) and Item price.
So the label carries the name, the price and a barcode with the code printed underneath. The "Item barcode", "Item serial number" and "Serial number barcode" boxes are cleared — an ordinary power tool does not need them.
Open goods receipt No. 9 and choose "Printing labels": the system builds a PDF with as many pages as there are units in the document — three drills, three labels.
Where each element comes from
- Item Code — the code from the document line.
- Item code barcode — the same code drawn as a barcode.
- Item barcode — the barcode from the item card; when the card has none, the system looks it up in the Barcodes register.
- Item Name — the description from the document line, trimmed to "Max Item Name Length".
- Item serial number and Serial number barcode — the number from the receipt line. Meaningful for serial-tracked goods whose numbers came from the generator.
- Item price — the price from the item card. When Item pricelist is filled, the price is taken from that price list as of the document date, together with its currency.
- Max. serial number length for barcode printing — a safeguard: if the serial number is longer than the given number of characters, the barcode is not printed (a very long number simply will not fit).
Text under barcode controls the layout: cleared — the text goes above the barcode with the code printed under it; ticked — the barcode is on top and the code and name follow underneath on separate lines. The second layout suits thermal printers.
Print action decides what happens to the generated PDF: Open in new tab (the default), Print dialog to raise the printer dialog immediately, or Download PDF file to save it.
Custom label print form — pick a ready print form and the label is printed from it, while the rest of the fields here become inactive: the form defines the layout completely.
The "Service orders" tab
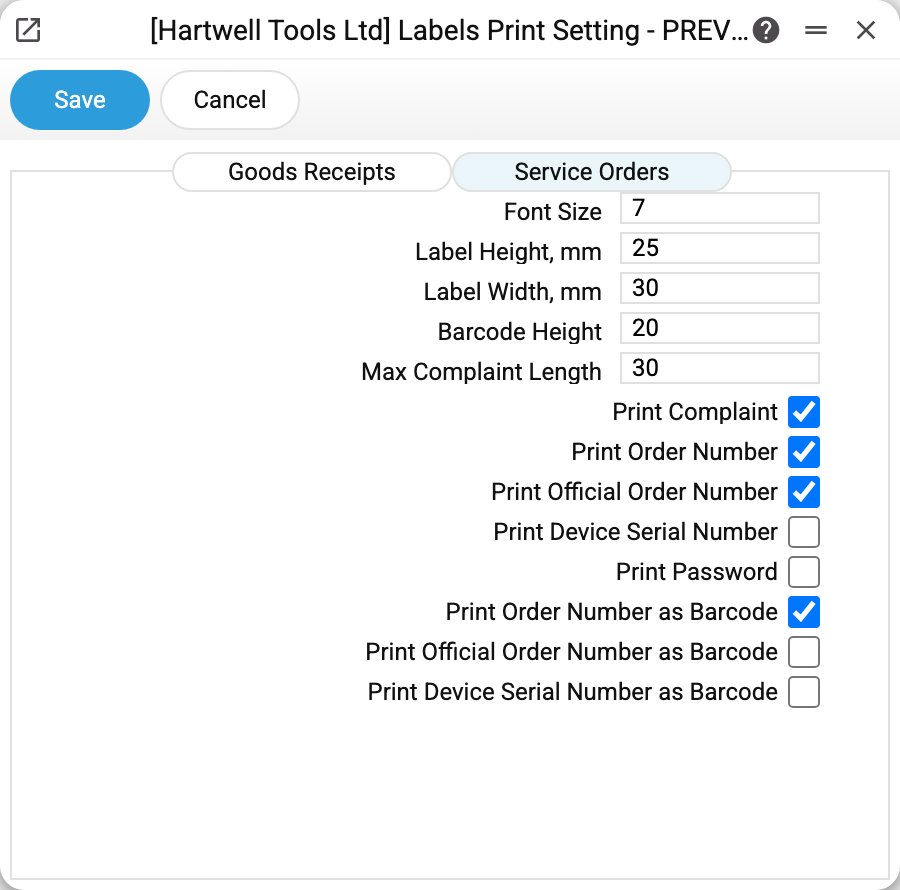
The second label is the sticker attached to a device handed in for service, so that units on the shelf do not get mixed up. It has its own size and font, and can show the order number, the official number, the device serial number, the password and the complaint (with a length limit). The first three can also be printed as barcodes — then the receptionist scans the sticker instead of searching for the order by hand.
Typical situations
The label is empty or cut off. Check the size: at 25 × 30 mm with font 7 the text will not fit. Reduce the font and "Max Item Name Length" first, and only then enlarge the label.
The barcode is not printed. Either the matching box is cleared, or the item has no barcode at all — neither on the card nor in the Barcodes register.
The price on the label is wrong. Without a price list the price comes from the card. For promotional tickets, name a price list in the "Item pricelist" field.
More labels came out than expected. That is by design: one label per unit. Twenty pieces in a line mean twenty pages.
Where to look next
- Goods receipts — where labels are printed from.
- Serial No. range — to get the serial number onto the label.
- Barcodes — where an item's extra barcodes live.