A cashier's day
The till is a separate application, not a window of the system. It opens in a browser at its own address, looks different, and is built for a touchscreen and a scanner rather than a mouse. That is why "how do I open the cashier's screen" has a completely different answer from everything else in ERPJS: not through the menu, but by a link.
This article walks through an ordinary day: sign in, open the shift, ring up a receipt, take the money, put cash in or take it out, close the shift.
Video walkthrough: POS in ERPJS step by step — a cashier's day from opening the shift to closing it.
Step 1. Open the till and sign in twice
The address comes from your administrator and looks like https://your-server/pos. The sign-in screen has two fields and two links:
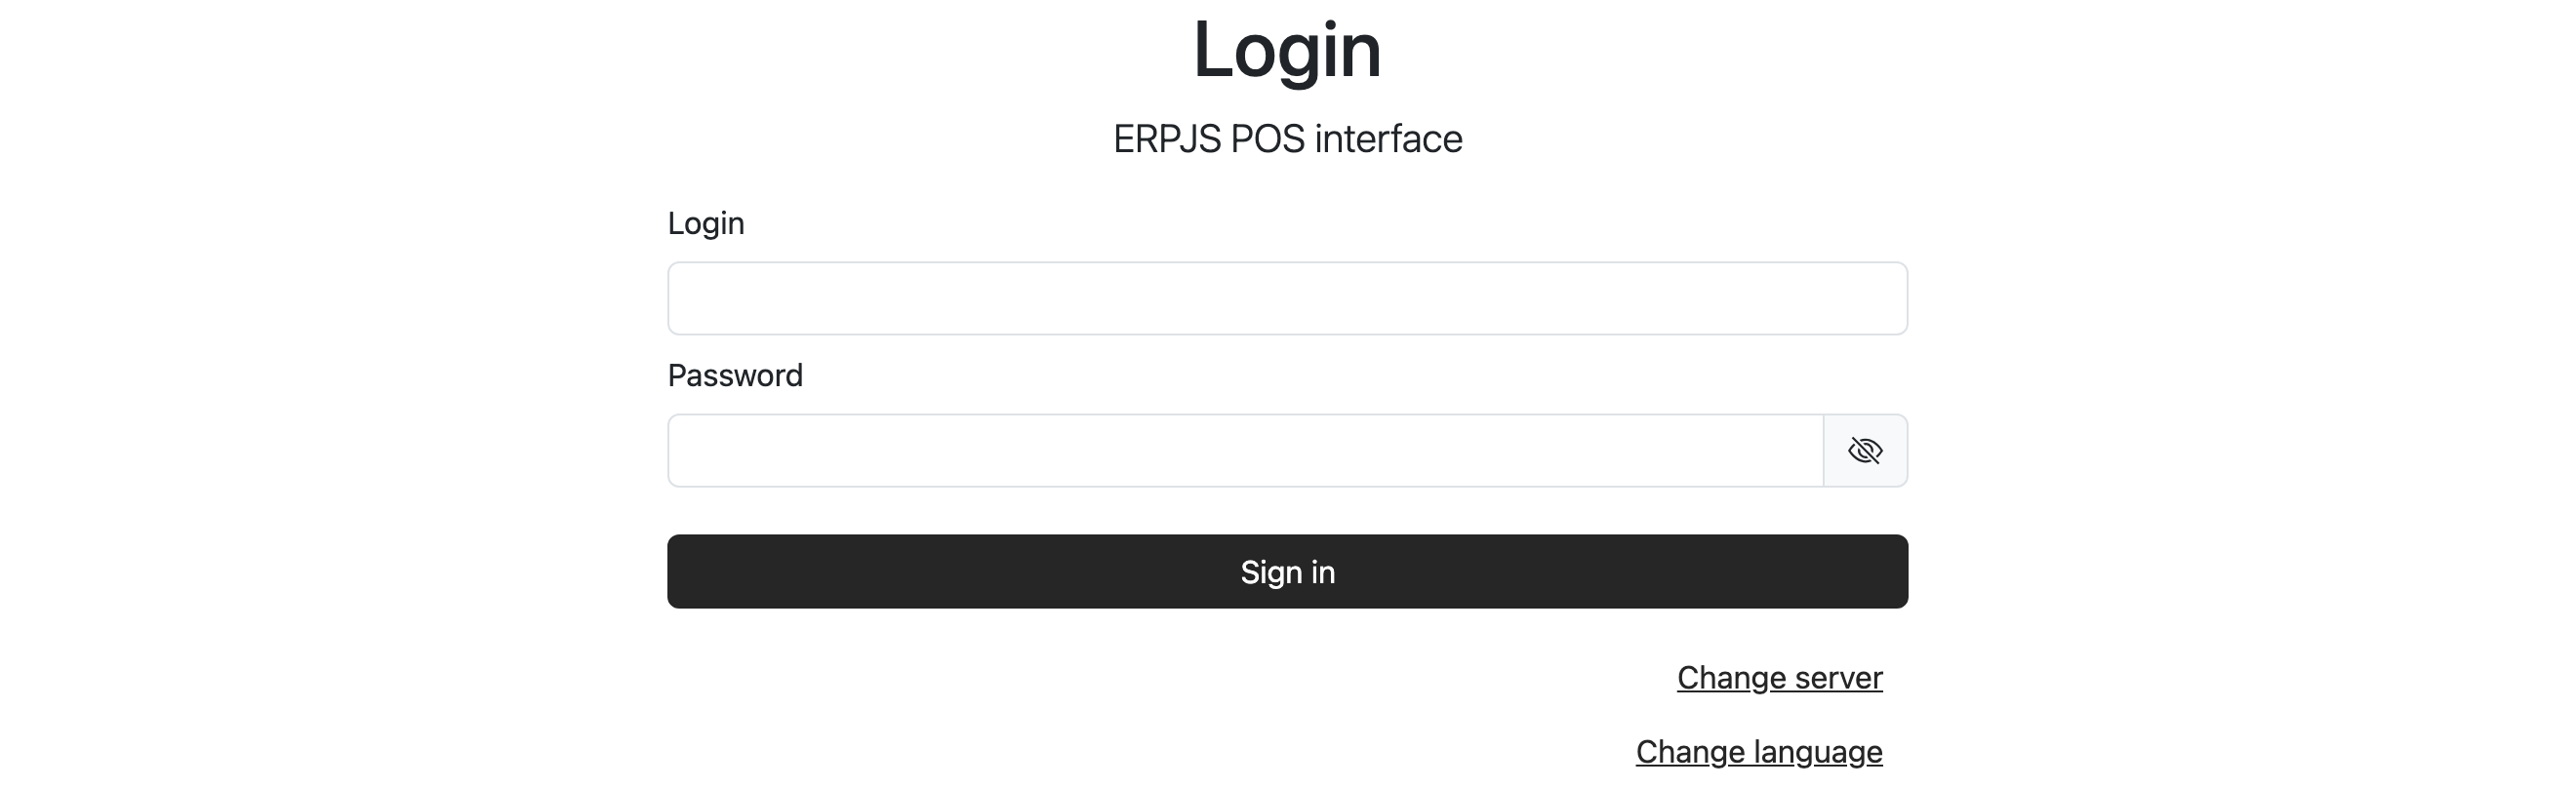
- "Change server" — where the till goes for its data. Set once on this device; the till remembers it afterwards.
- "Change language" — the language of the till itself. It is separate from the system's language and is also remembered on the device.
"Login" and "Password" here are not your personal account but the account of the point of sale: a separate user created for this till. The login is capitalised automatically.
This is the first of two sign-ins. The point of sale answers "which till is this", the cashier answers "who is standing at it". So another sign-in follows.
If the system replies User must have a department, the "Department" field is empty in that user's card — without it the user cannot be a till.
Step 2. The till screen
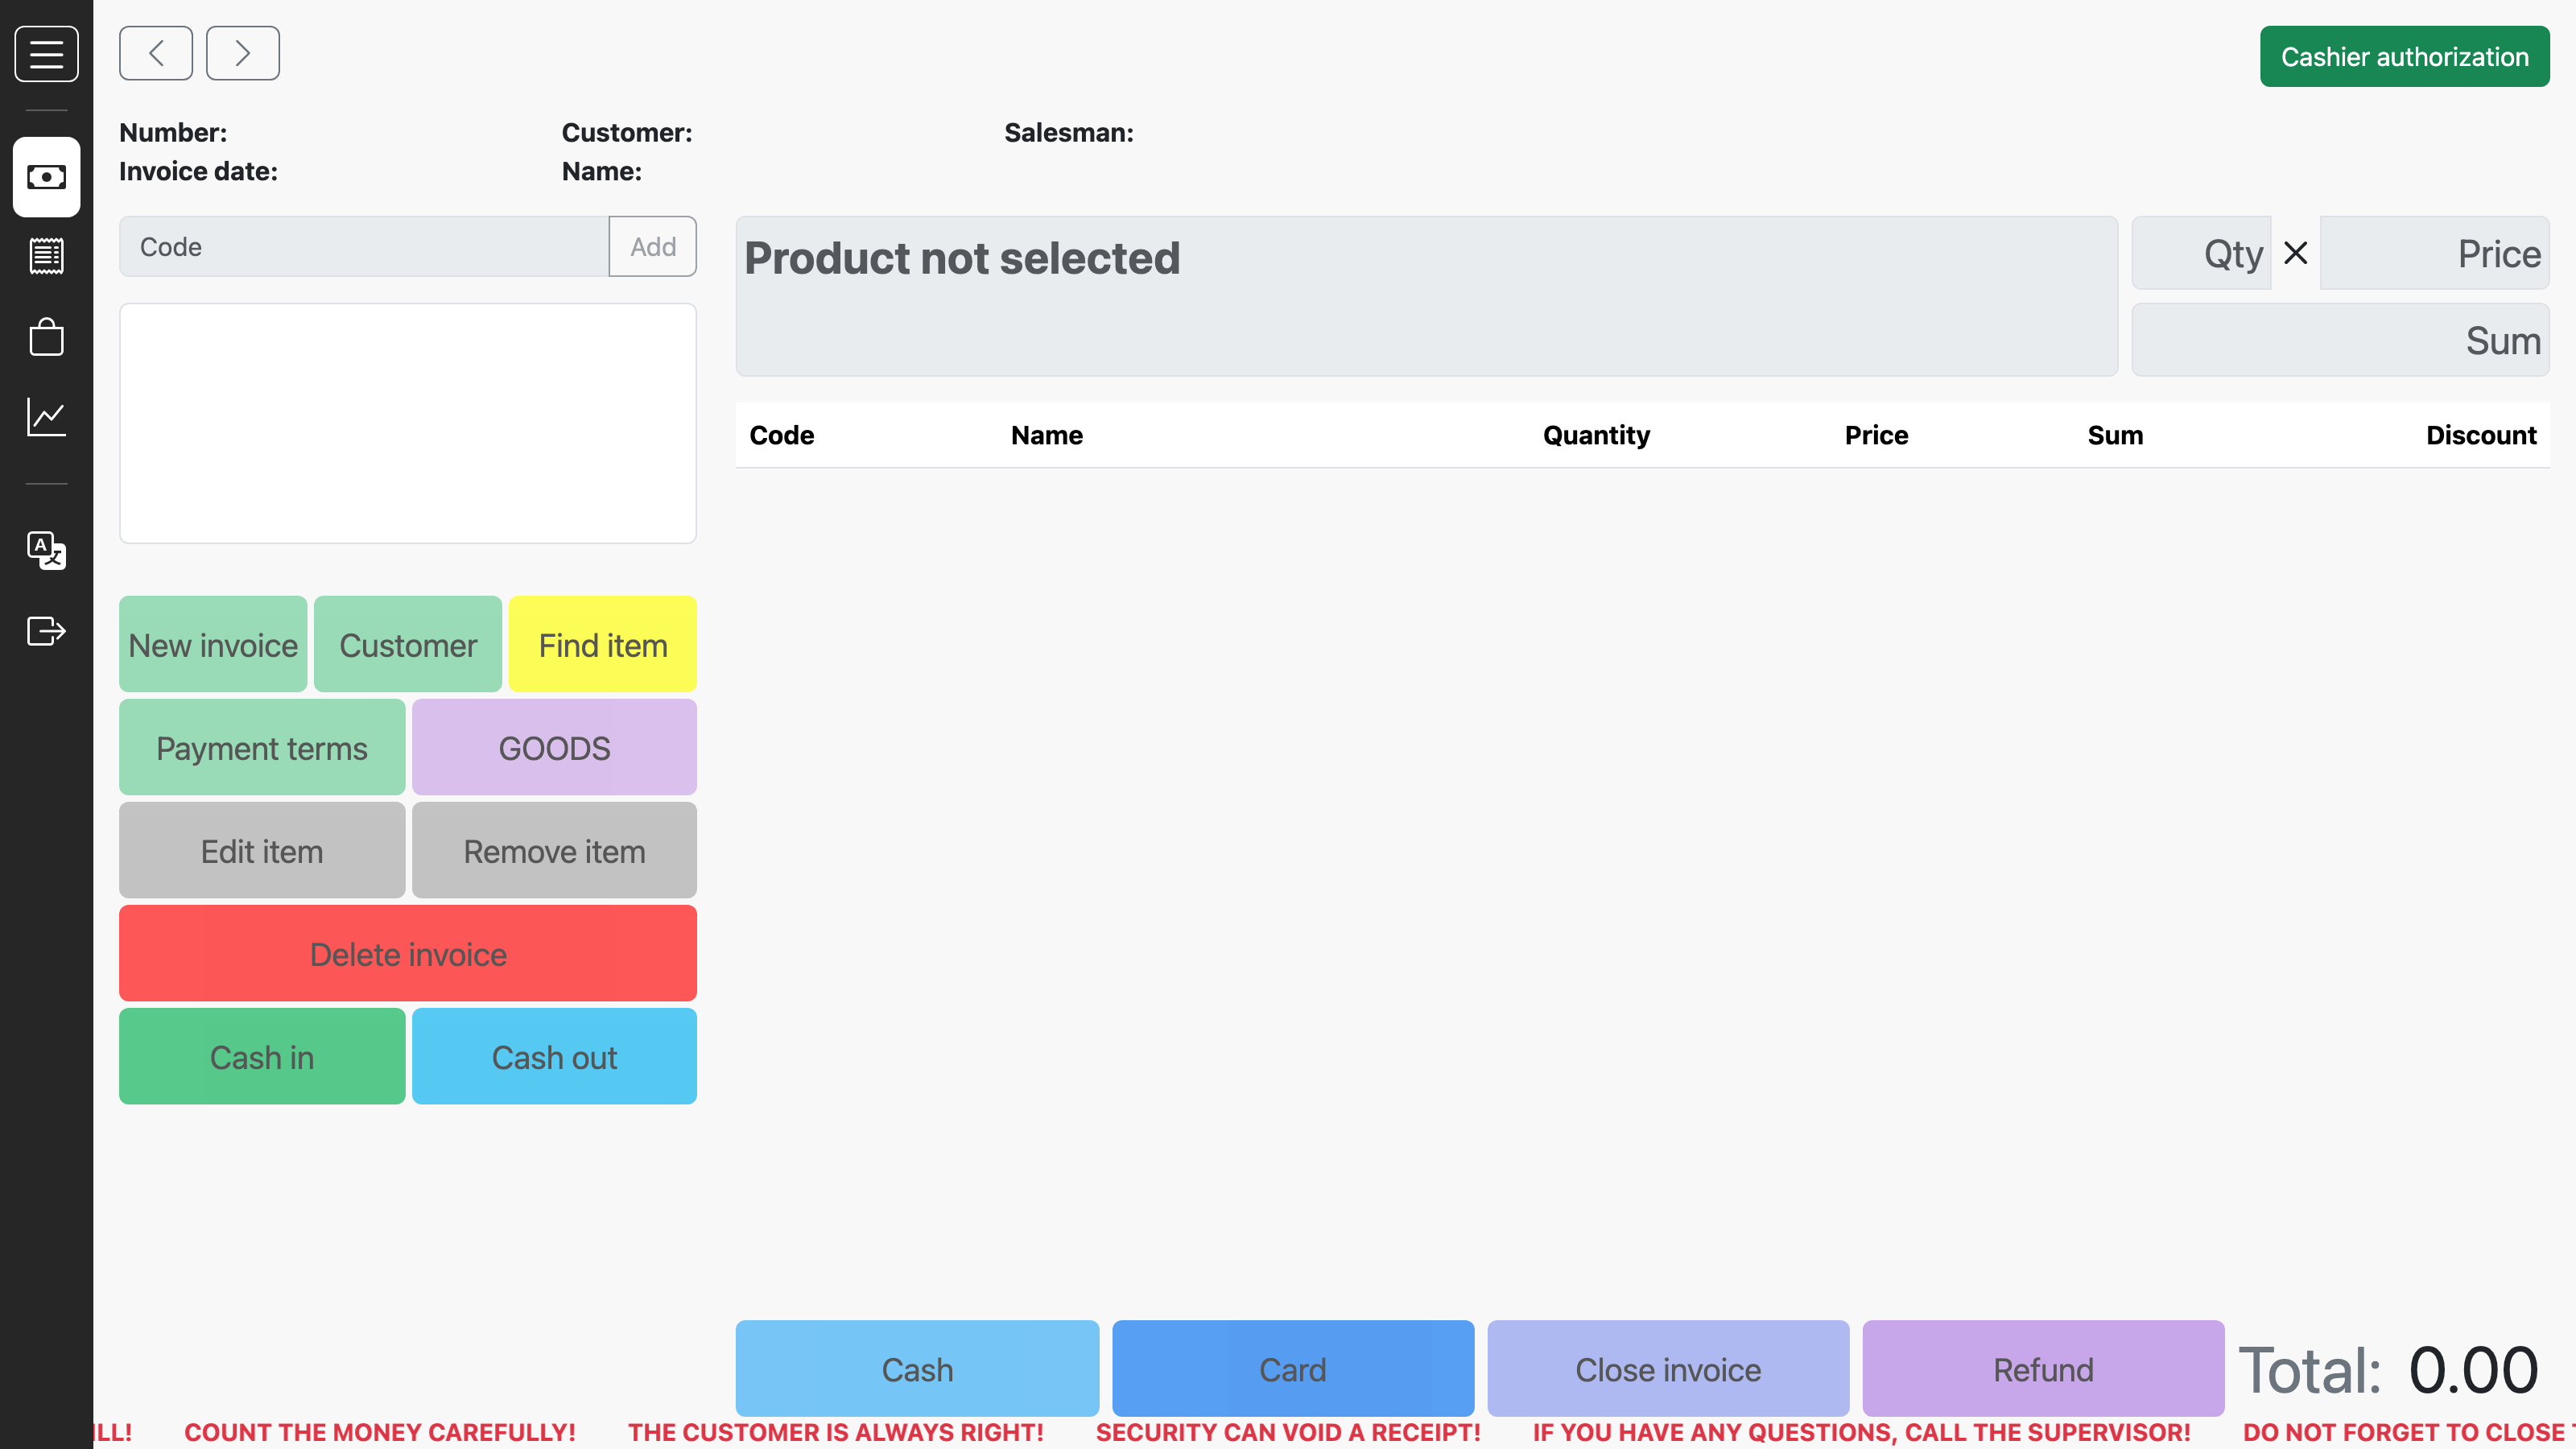
What is on it:
- the header — receipt number, date, customer, salesman and how much money is in the drawer;
- the "Code" field with the "Add" button — where a barcode from the scanner or an item code from the keyboard lands;
- the buttons on the left — commands and fast-moving items assembled for your shop (POS Buttons); a page button ("GOODS" in the example) switches between sets;
- the bottom row — payment and closing the receipt;
- the ticker at the bottom — reminders for the cashier, set in the tips setting;
- the narrow strip on the left — the sections: selling, invoices, items, reports, language, sign out.
Top right there is a green "Cashier authorization" button. Until it is pressed, nothing can be sold: adding an item answers Log in as a cashier to start selling.
Step 3. The shift opens by itself
Press "Cashier authorization" and enter the cashier's login and password.
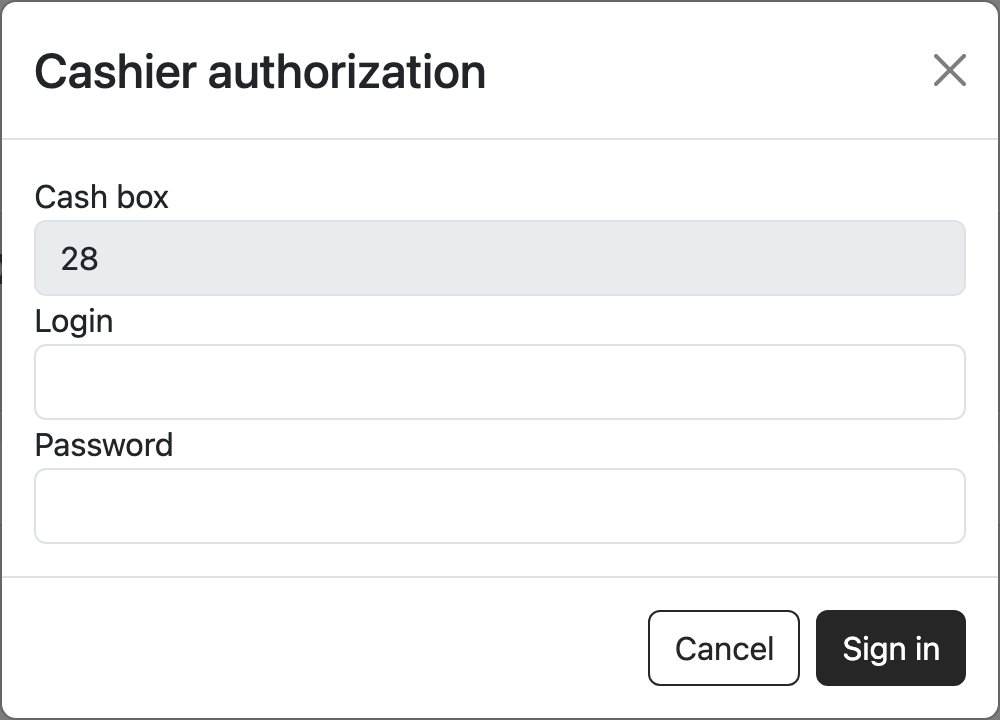
The "Cash box" field at the top is filled in and greyed out: this is the cash left in the drawer from the previous shift. It is neither typed in nor confirmed — the system takes the amount the previous shift on this till closed with.
There is no separate "open shift" button, and there is no point looking for one. The shift opens right here, at the moment the cashier signs in: the system writes an "opening" row into POS Sessions with that amount. The green button then turns into a red "Close shift", and a "Cash box" field appears in the header.
Two consequences:
- the same cashier signing in again does not open a new shift — they return to their own, still open one;
- if the previous cashier left without closing the shift, the next sign-in closes it first and only then opens a new one (except a locked till and a fiscal till with cash in it — see "Typical situations").
Step 4. The receipt
"New invoice" starts a receipt. Items are then added in one of three ways: with a scanner into the "Code" field, with an item button from a button page, or through search ("Find item").
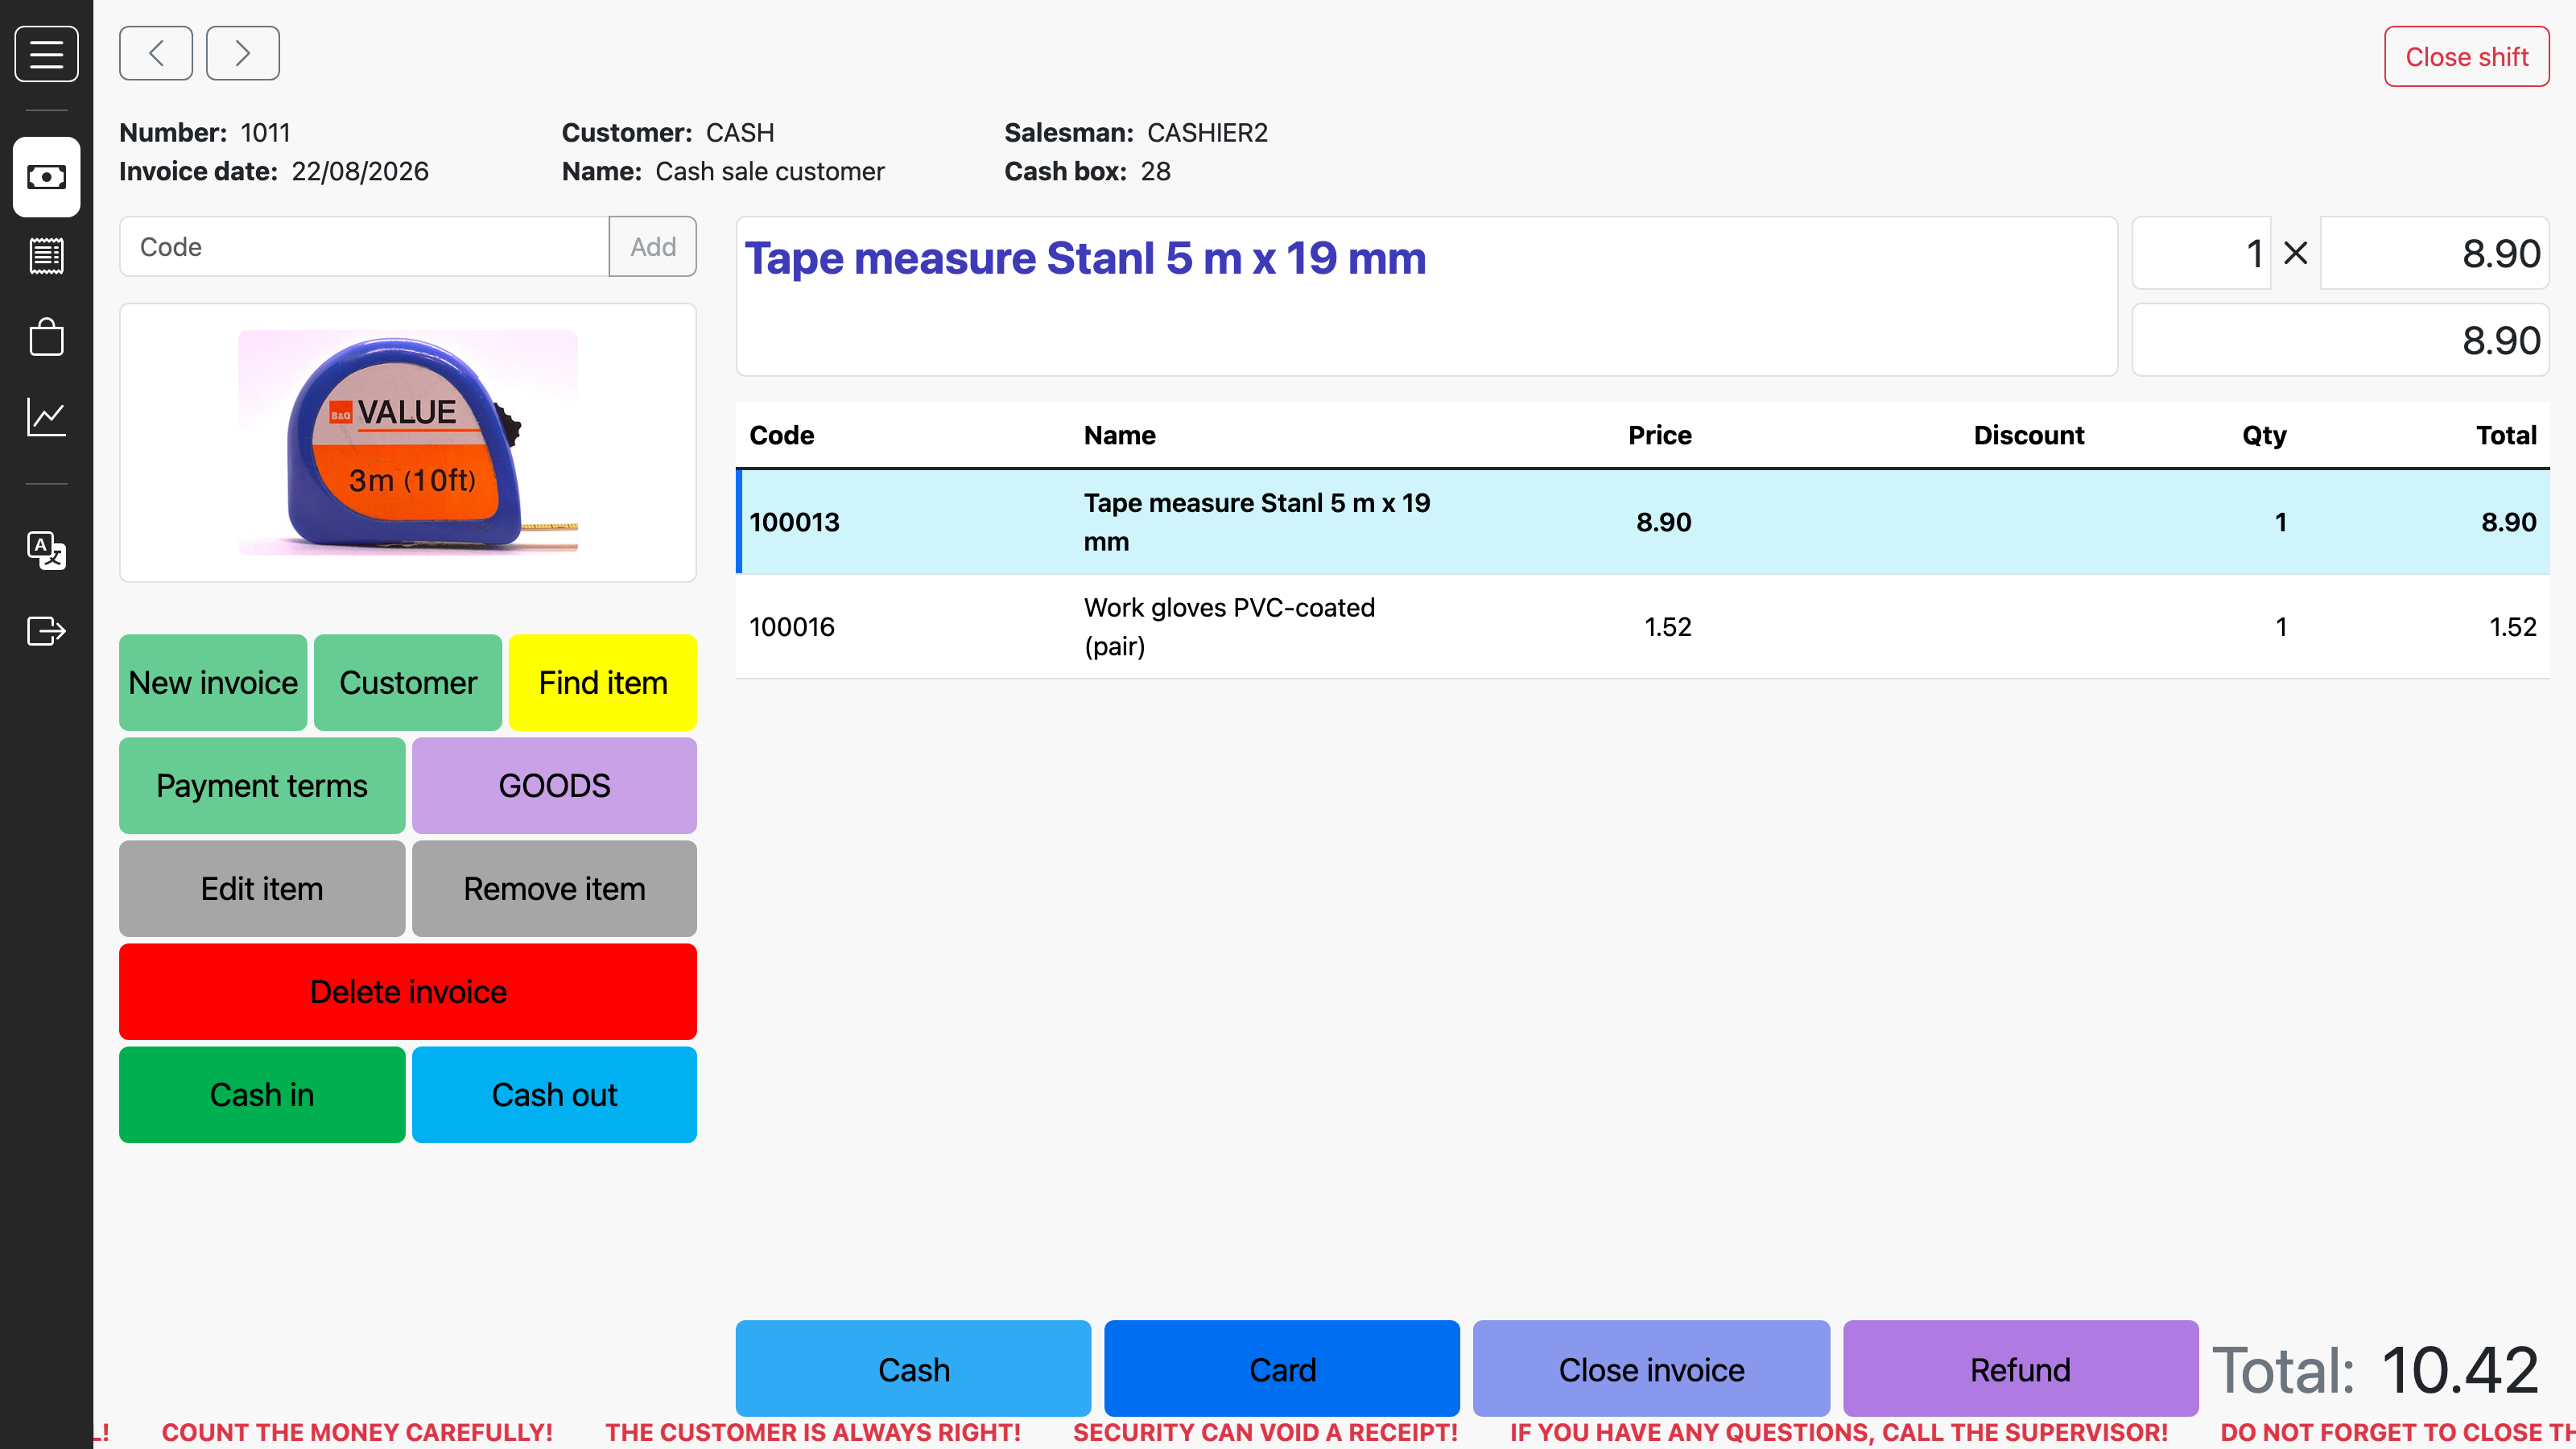
In the example the receipt holds two lines totalling 10.42. The selected line is shown separately at the top — quantity, price and amount — and it is that line the "Edit item" and "Remove item" buttons work on. "Delete invoice" removes the whole receipt.
The customer is filled in automatically — the one recorded in the point of sale card ("Cash sale customer" in the example). The "Customer" button is needed only when the buyer has to be named. If no default customer is set, the till refuses to create a receipt at all: Field "Customer" is required!
Step 5. The money
Payment is taken with "Cash" or "Card".
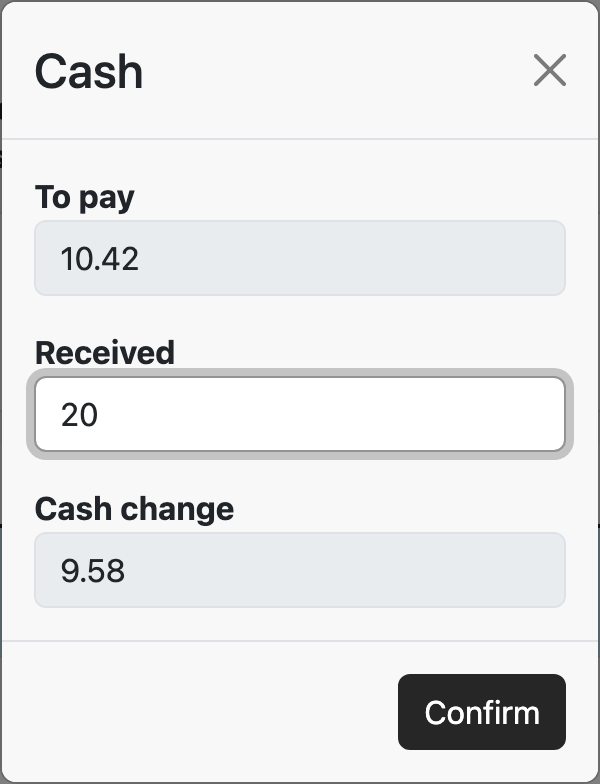
"To pay" is the receipt total and is not edited. "Received" is what the buyer handed over, and "Cash change" shows the change. A receipt can also be settled with two payments — part in cash, part by card.
After the payment, press "Close invoice". That is the moment of sale: the receipt becomes an approved document, the goods are written off the till's warehouse, and the money lands on the account set in the POS settings. Until that button, nothing has left the stock.
If the goods are not in the till's warehouse, closing is refused: Not enough product "code" in stock!. The till writes off from the warehouse named in the point-of-sale user's card — "it is in another warehouse" does not count here, and the system says so: check stock in another location.
Step 6. Cash outside receipts
Not all the money in the drawer comes from buyers: change was broken, a courier was paid, coins were put in in the morning. Two buttons cover this — "Cash in" and "Cash out".
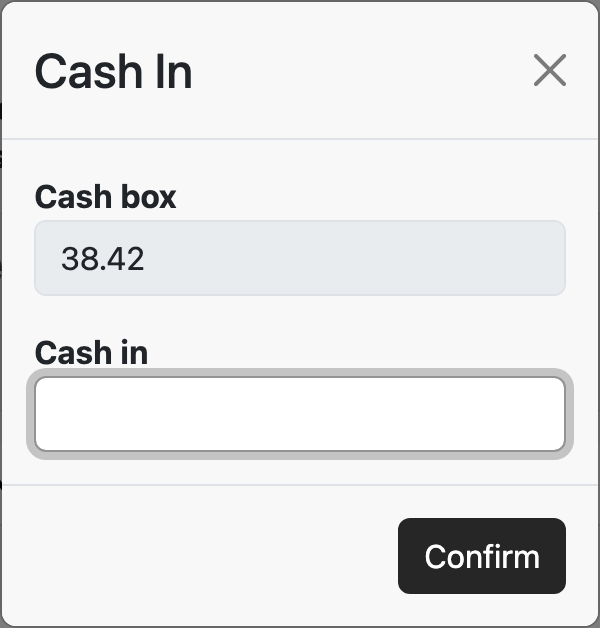
The top line is what is in the drawer now, below it is what to put in or take out. Every such operation becomes its own row in Cash In/Out carrying your shift number, which is exactly why the drawer reconciles with the documents at the end of the day.
Step 7. Close the shift
At the end of the day — the red "Close shift" button at the top right.
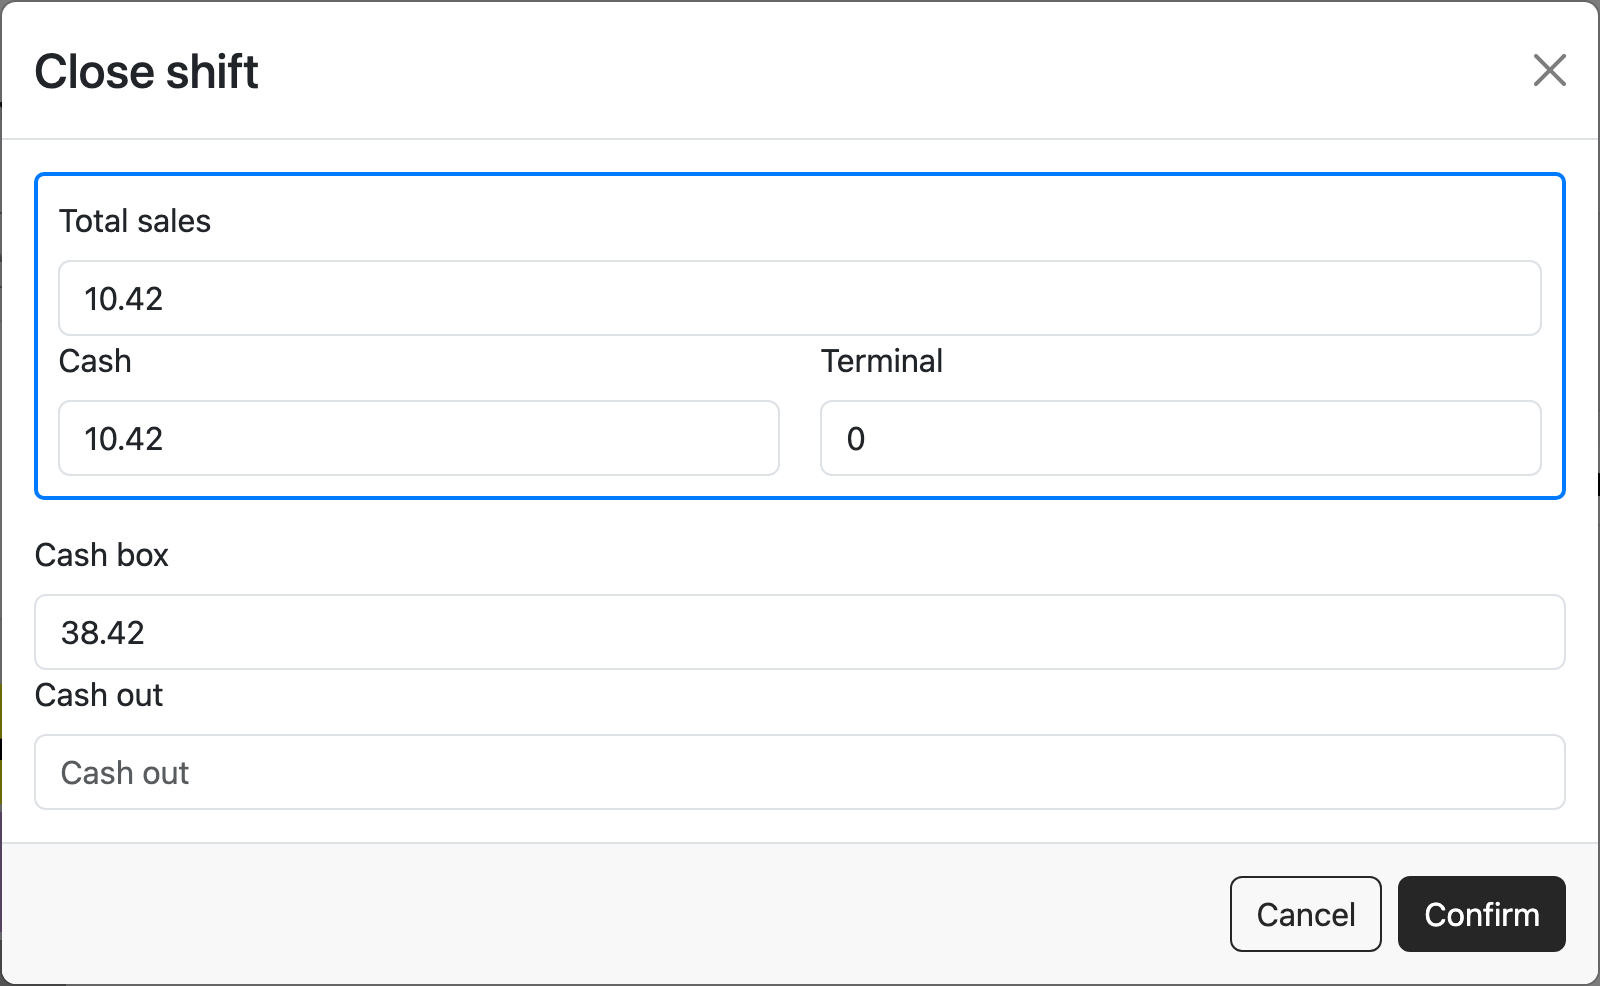
The window shows the totals and waits for one decision:
| Field | What it means |
|---|---|
| "Total sales" | how much was sold during the shift, split into "Cash" / "Terminal" |
| "Cash box" | how much cash should be in the drawer: the opening amount plus cash takings, plus cash in, minus cash out |
| "Cash out" | how much you are taking out of the drawer now |
Whatever you enter in "Cash out" leaves as a cash-out document; the rest stays in the drawer and becomes the opening amount of the next shift. Take it all — the next cashier starts from zero; leave the float — they start with it.
On a fiscal till (Vchasno.Kasa is connected) you cannot leave money in: the shift is closed only with an empty till, so "Cash out" takes the whole remainder, otherwise the closing is refused ("A fiscal shift is closed only with an empty till…"). The next cashier puts the float in with the "Cash in" button.
Takings handed over to a safe or a bank are recorded separately — POS Cash Collection. It moves the cash onto the "money in transit" account, and that is where it waits for the bank, not in the till.
After the confirmation the cashier leaves the shift and the screen returns to the "cashier authorization needed" state.
Typical situations
I cannot find the button that opens a shift. There is none: the shift opens when the cashier signs in. The red "Close shift" at the top right means a shift is already open.
The till says to sign in as a cashier, but I have signed in. You signed in as the point of sale — that is the first of two sign-ins. The second is the green "Cashier authorization" button.
I forgot to close yesterday's shift. Nothing is lost. If the same cashier signs in today, they continue yesterday's shift: it stays open until they close it with "Close shift". A different cashier's sign-in closes yesterday's shift by itself — with the cash the system recalculated from the shift's documents (opening, receipts, deposits, withdrawals). It does not know the actual count in the drawer, so look for the difference in the cash-out report. The shift does not close by itself in two cases: on a fiscal till while cash is left in it (the sign-in is refused until the cashier of that shift takes the remainder out), and when the till was locked with "Lock till" — the lock is lifted by the shift's cashier with their password or by the back office in POS Sessions.
The drawer does not match what the till shows. The till does not count money, it counts documents: the shift opening, receipts, cash in, cash out. A difference means some operation went past the till.
I see no reports in the till. Reports are not shown to everyone: there must be a record in the POS report settings for this department and this point of sale. The cashier does not affect the list: the till asks for reports by the pair "department + point of sale", whoever is signed in.
The buttons on the screen are not the ones I need. The screen is assembled in POS Buttons: every button is an action from a fixed list, an item, or a jump to another button page. That is configuration, not programming.
The wrong receipt was rung up. While the receipt is open — "Delete invoice". Once closed it is an approved document: either "Refund" at the till, or removing the OK in the system. On a till where eTIMS works (Kenya), a refund starts from a new empty receipt, and the till asks which receipt is being refunded.
Several units of the same item are returned. On a refund receipt the quantity counts the same way as on a sale, only with a minus: scanning the item again or "+" adds one more unit to the refund (−1, −2, −3). "−" reduces the refund, but not to zero: the till warns "A refund row cannot be reduced to zero or below — remove the row!". To take an item off the refund, delete the row.
Where to look next
- POS — the whole module: settings, buttons, reports, cash collection.
- POS Sessions — the shift journal: openings, closings, amounts.
- Cash In/Out — cash movements inside a shift.
- POS Cash Collection — handing over the takings.
- Cash-out report — the whole shift on one sheet.
- Vchasno.Kasa — the fiscal receipt and the Z-report.
- Offline client — a till that works without the internet.